-
Inspiracje
- Najnowsze
- Najpopularniejsze
- Zaskocz mnie
- Obserwowane
- MAGazyn
- Moda damska
- DIY - zrób to sam
- Kuchnia
- Uroda
- Wnętrza
- Humor
- Ogród
- Ślub
- Architektura
- Biżuteria
- Design
- Dziecko
- Film
- Fotografia
- Gadżety
- Historia
- Hobby
- Inne
- Książka
- Moda męska
- Muzyka
- Nauka i natura
- Plakaty i obrazy
- Podróże i miejsca
- Samochody i motocykle
- Sport i fitness
- Święta i uroczystości
- Tatuaż
- Zwierzęta
- Partnerzy
- KONKURS
-
Zakupy
-
ONA
- Ubrania
- Bielizna
- Bluzki
- Bluzy
- Dresy damskie
- Kombinezony
- Koszule
- Koszulki
- Kurtki
- Płaszcze
- Spodnie i leginsy
- Spodnie jeans
- Spódnice
- Stroje kąpielowe
- Sukienki i tuniki
- Swetry
- Szorty
- Zestawy
- Żakiety i kamizelki
- Buty
- Baleriny
- Botki
- Czółenka
- Espadryle
- Glany
- Japonki
- Kalosze
- Klapki
- Koturny
- Kowbojki
- Kozaki
- Obuwie Domowe
- Półbuty
- Sandały
- Sportowe i lifestyle
- Szpilki
- Tenisówki i Trampki
- Trapery i trekkingi
- Dodatki
- Bransoletki i zawieszki
- Breloki
- Czapki i kapelusze
- Etui
- Kolczyki, nausznice
- Kołnierzyki
- Kosmetyczki
- Naszyjniki, kolie i zawieszki
- Okulary
- Ozdoby do włosów
- Parasole
- Paski
- Pierścionki
- Plecaki
- Portfele
- Rękawiczki
- Skarpety
- Szaliki i chusty
- Torby i torebki
- Walizki
- Zegarki
- Zestawy biżuterii
- Zdrowie i uroda
- Akcesoria kosmetyczne
- Balsamy
- Bazy i podkłady
- Cienie do oczu
- Dezodoranty
- Higiena jamy ustnej
- Korektory
- Kredki
- Kremy i serum
- Lakiery
- Manicure i pedicure
- Maseczki
- Odżywki
- Peeling
- Perfumy i wody perfumowane
- Pielęgnacja po opalaniu
- Płyny żele i mydła
- Pomadki i błyszczyki
- Pudry
- Róże
- Stylizacja włosów
- Szampony
- Toniki i demakijaż
- Tusze
- Wody toaletowe
- Zestawy
-
ON
- Ubrania
- Bielizna
- Bluzy
- Kąpielówki
- Koszule
- Kurtki i płaszcze
- Marynarki kamizeki
- Spodenki i szorty
- Spodnie
- Swetry
- T-shirt długi rękaw
- T-shirt i Polo
- KULTURA
- GADŻETY
- DZIECKO
-
DOM I WNĘTRZE
- Wnętrza
- Akcesoria dom
- Do baru
- Do biura
- Do kuchni
- Kubki kufle i kieliszki
- Lustra
- Nakrycia stołu
- Oświetlenie
- Plakaty i tablice
- Pościele, poduszki i nakrycia
- Przechowywanie
- Tekstylia
- Zegary i budziki
-
Marki
- MARKI
- Adidas
- Adriatica
- Alter Core
- Armani
- Asics
- Atlantic
- Azzaro
- Barbie
- Bburago
- Be-U
- Benetton
- Bering
- Black Plum
- Burberry
- Bvlgari
- Cacharel
- Calvin Klein
- Canon
- Carolina Herrera
- Carrera
- Casio
- Celestron
- Chanel
- Chloe
- Clinique
- Cobi
- Coloud
- Converse
- David Beckham
- Davidoff
- Delbana
- Diesel
- Dior
- DISNEY
- DKNY
- Dolce & Gabbana
- DOXA
- Dr. Martens
- Dunhill
- Ecco
- Elizabeth Arden
- Esprit
- EVC DSGN
- Festina
- Fila
- Fisher Price
- Frederique Constant
- Givenchy
- Gucci
- Guerlain
- Guess
- Hasbro
- Helena Rubinstein
- Hermes
- Hi-Tec
- Hugo Boss
- Hunter
- Iceberg
- Ingersoll
- Issey Miyake
- Jean Paul Gaultier
- Jennifer Lopez
- Jil Sander
- Jimmy Choo
- Joop!
- Juicy Couture
- Kappa
- Kenzo
- Komono
- Lacoste
- Lalique
- Lancome
- Lanvin
- Lee
- Lego
- Lorus
- Marc Jacobs
- Marshall
- Masaki Matsushima
- Matchbox
- Mattel
- Max Factor
- Max&Co
- Mc Arthur
- Mizuno
- Mont Blanc
- Moschino
- Mr. Gugu & Miss Go
- My Little Pony
- New Balance
- Nike
- Nikon
- Nina Ricci
- Ninety Eight Clothing
- Nivea
- Nixon
- Nooka
- Obaku
- Onitsuka Tiger
- Paco Rabanne
- Pentax
- Pewex
- Pierre Cardin
- Playboy
- Prada
- Puma
- Ralph Lauren
- Reebok
- Regatta
- Revlon
- Rexona
- Rider
- Salomon
- Salvatore Ferragamo
- Shelyak
- Shiseido
- Skagen
- Swarovski
- Takahashi
- Thierry Mugler
- Timberland
- Timex
- Tommy Hilfiger
- UGC
- Urbanears
- Valentino
- Vans
- Versace
- Viktor & Rolf
- Vixen
- Welly
- William Optics
- Wrangler
- Yimaida
- Yukon
- Yves Saint Laurent
-
ONA
-
Szukaj
- Losuj
DIY - zrób to sam
gifts

holiday guest post // holiday mantle craft from candice stringham. | Love Taza
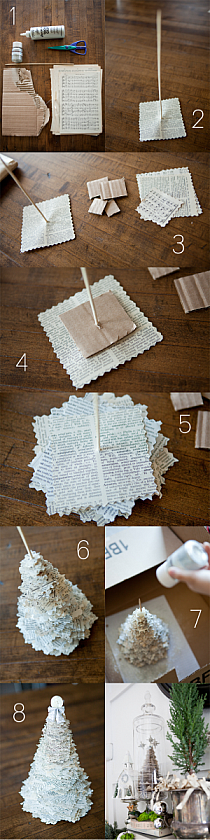
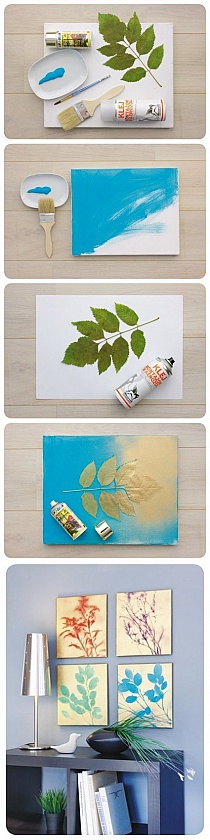
Step 1: Gather supplies, the supplies for this project are simple. You will probably have most of them at home. All you need are book pages. They can come from any book. I used old sheet music and some dictionary pages, tacky glue (but really any kind of glue would work), hot glue, a wooden dowel (I didn’t have one so I just used a wood skewer, the kind that you use to make shish kabob’s), card board (I just cut up an old box), a pair of zig zag scissors (you can find these at any craft store) or pinking shears, and two buttons.
Step 2: Make a base with the card board and glue it to the bottom of the skewer. Cover it with book paper so you can see it.
Step 3. Cut lots and lots of book pages. Start with the largest size. Make it the widest you want the tree to be. You need 9 squares of each size you cut. Then, cut 9 squares a quarter of an inch smaller, then 9 more a quarter of an inch smaller than that, and so on and so forth until you get to the smallest size you want. If you want the tree to be taller you can cut the squares an 1/8th of an inch smaller. If you want the tree to be shorter you can cut them 1/2 and inch smaller so there are less layers. It’s a great project because you can make the trees as short or as tall as you would like.
Cut small squares of card board to go in between layers of paper. You don’t want them to be seen so keep them fairly small.
Step 4. Place three sheets of each size of paper together and slide them down the skewer. Rotate each piece so that they create different points of your tree. Then, add a piece of cardboard on top. This acts as a filler so that the tree has lots of volume without having to have tons of paper.
Step 5. I used three sheets of paper for each layer and I did three layers for each size. That is why you need 9 papers per size. You could do more layers of the same size if you wanted the tree to be taller. Just make sure you keep rotating each piece so your tree has lots of different angles.
Step 6. Continue stacking paper and cardboard until you get to the top!
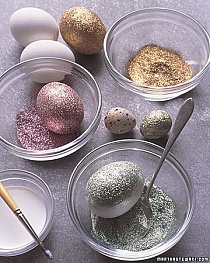
Step 7. Use a little tacky glue or any kind of clear drying glue on a paint brush and brush from the top to the bottom of the tree catching the edges. You want to get the glue anywhere snow would land on a real tree. Then glitter! I always glitter things in a box and over a paper. The paper catches most of the extra glitter so I can use it again and the box keeps it from getting everywhere.
Step 8. Add something to top it off. I used vintage pearl buttons but you could use a little ornament or star to top it off.
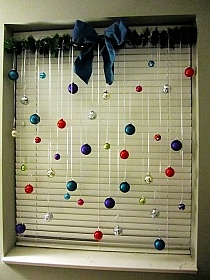
And there you have it! Your very own paper christmas tree complete with glittery snow. You could leave it just as it is or add it to any Christmas vignette. I placed mine in a large glass jar and added stars to hang around it from fishing line. It was the perfect addition to my mantle!
Step 1: Gather supplies, the supplies for this project are simple. You will probably have most of them at home. All you need are book pages. They can come from any book. I used old sheet music and some dictionary pages, tacky glue (but really any kind of glue would work), hot glue, a wooden dowel (I didn’t have one so I just used a wood skewer, the kind that you use to make shish kabob’s), card board (I just cut up an old box), a pair of zig zag scissors (you can find these at any craft store) or pinking shears, and two buttons.
Step 2: Make a base with the card board and glue it to the bottom of the skewer. Cover it with book paper so you can see it.
Step 3. Cut lots and lots of book pages. Start with the largest size. Make it the widest you want the tree to be. You need 9 squares of each size you cut. Then, cut 9 squares a quarter of an inch smaller, then 9 more a quarter of an inch smaller than that, and so on and so forth until you get to the smallest size you want. If you want the tree to be taller you can cut the squares an 1/8th of an inch smaller. If you want the tree to be shorter you can cut them 1/2 and inch smaller so there are less layers. It’s a great project because you can make the trees as short or as tall as you would like.
Cut small squares of card board to go in between layers of paper. You don’t want them to be seen so keep them fairly small.
Step 4. Place three sheets of each size of paper together and slide them down the skewer. Rotate each piece so that they create different points of your tree. Then, add a piece of cardboard on top. This acts as a filler so that the tree has lots of volume without having to have tons of paper.
Step 5. I used three sheets of paper for each layer and I did three layers for each size. That is why you need 9 papers per size. You could do more layers of the same size if you wanted the tree to be taller. Just make sure you keep rotating each piece so your tree has lots of different angles.
Step 6. Continue stacking paper and cardboard until you get to the top!
Step 7. Use a little tacky glue or any kind of clear drying glue on a paint brush and brush from the top to the bottom of the tree catching the edges. You want to get the glue anywhere snow would land on a real tree. Then glitter! I always glitter things in a box and over a paper. The paper catches most of the extra glitter so I can use it again and the box keeps it from getting everywhere.
Step 8. Add something to top it off. I used vintage pearl buttons but you could use a little ornament or star to top it off.
And there you have it! Your very own paper christmas tree complete with glittery snow. You could leave it just as it is or add it to any Christmas vignette. I placed mine in a large glass jar and added stars to hang around it from fishing line. It was the perfect addition to my mantle!

Komentarze
Podobne inspiracje


2222
60
1
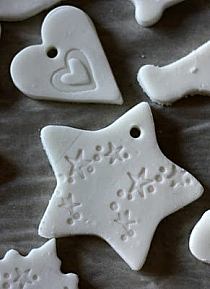
christmas - 1/2 szklanki mąki ziemniaczanej, 1 szklanka…

388
52
zrób sama urodzinową dekorację dla dziewczynki, opis na…


82
13
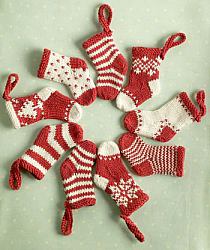
Christmas DIY - skarpetki na choinkę, opis i wykrój na…


147
10
Dekoracja do pokoju chłopca - zrób sama, opis na stroni…
W 288 innych kolekcjach


