-
Inspiracje
- Najnowsze
- Najpopularniejsze
- Zaskocz mnie
- Obserwowane
- MAGazyn
- Moda damska
- DIY - zrób to sam
- Kuchnia
- Uroda
- Wnętrza
- Humor
- Ogród
- Ślub
- Architektura
- Biżuteria
- Design
- Dziecko
- Film
- Fotografia
- Gadżety
- Historia
- Hobby
- Inne
- Książka
- Moda męska
- Muzyka
- Nauka i natura
- Plakaty i obrazy
- Podróże i miejsca
- Samochody i motocykle
- Sport i fitness
- Święta i uroczystości
- Tatuaż
- Zwierzęta
- Partnerzy
- KONKURS
-
Zakupy
-
ONA
- Ubrania
- Bielizna
- Bluzki
- Bluzy
- Dresy damskie
- Kombinezony
- Koszule
- Koszulki
- Kurtki
- Płaszcze
- Spodnie i leginsy
- Spodnie jeans
- Spódnice
- Stroje kąpielowe
- Sukienki i tuniki
- Swetry
- Szorty
- Zestawy
- Żakiety i kamizelki
- Buty
- Baleriny
- Botki
- Czółenka
- Espadryle
- Glany
- Japonki
- Kalosze
- Klapki
- Koturny
- Kowbojki
- Kozaki
- Obuwie Domowe
- Półbuty
- Sandały
- Sportowe i lifestyle
- Szpilki
- Tenisówki i Trampki
- Trapery i trekkingi
- Dodatki
- Bransoletki i zawieszki
- Breloki
- Czapki i kapelusze
- Etui
- Kolczyki, nausznice
- Kołnierzyki
- Kosmetyczki
- Naszyjniki, kolie i zawieszki
- Okulary
- Ozdoby do włosów
- Parasole
- Paski
- Pierścionki
- Plecaki
- Portfele
- Rękawiczki
- Skarpety
- Szaliki i chusty
- Torby i torebki
- Walizki
- Zegarki
- Zestawy biżuterii
- Zdrowie i uroda
- Balsamy
- Bazy i podkłady
- Cienie do oczu
- Dezodoranty
- Higiena jamy ustnej
- Korektory
- Kredki
- Kremy i serum
- Lakiery
- Manicure i pedicure
- Maseczki
- Odżywki
- Peeling
- Perfumy i wody perfumowane
- Pielęgnacja po opalaniu
- Płyny żele i mydła
- Pomadki i błyszczyki
- Pudry
- Róże
- Stylizacja włosów
- Szampony
- Toniki i demakijaż
- Tusze
- Wody toaletowe
- Zestawy
-
ON
- Ubrania
- Bielizna
- Bluzy
- Kąpielówki
- Koszule
- Kurtki i płaszcze
- Marynarki kamizeki
- Spodenki i szorty
- Spodnie
- Swetry
- T-shirt długi rękaw
- T-shirt i Polo
- KULTURA
- GADŻETY
- DZIECKO
-
DOM I WNĘTRZE
- Wnętrza
- Akcesoria dom
- Ceramika i szkło
- Do baru
- Do biura
- Do kuchni
- Kubki kufle i kieliszki
- Lustra
- Nakrycia stołu
- Oświetlenie
- Plakaty i tablice
- Pościele, poduszki i nakrycia
- Przechowywanie
- Tekstylia
- Zegary i budziki
-
Marki
- MARKI
- Adidas
- Adriatica
- Alter Core
- Armani
- Asics
- Atlantic
- Azzaro
- Barbie
- Bburago
- Be-U
- Benetton
- Bering
- Black Plum
- Burberry
- Bvlgari
- Cacharel
- Calvin Klein
- Canon
- Carolina Herrera
- Carrera
- Casio
- Celestron
- Chanel
- Chloe
- Clinique
- Cobi
- Coloud
- Converse
- David Beckham
- Davidoff
- Delbana
- Diesel
- Dior
- DISNEY
- DKNY
- Dolce & Gabbana
- DOXA
- Dr. Martens
- Dunhill
- Ecco
- Elizabeth Arden
- Esprit
- EVC DSGN
- Festina
- Fila
- Fisher Price
- Frederique Constant
- Givenchy
- Gucci
- Guerlain
- Guess
- Hasbro
- Helena Rubinstein
- Hermes
- Hi-Tec
- Hugo Boss
- Hunter
- Iceberg
- Ingersoll
- Issey Miyake
- Jean Paul Gaultier
- Jennifer Lopez
- Jil Sander
- Jimmy Choo
- Joop!
- Juicy Couture
- Kappa
- Kenzo
- Komono
- Lacoste
- Lalique
- Lancome
- Lanvin
- Lee
- Lego
- Lorus
- Marc Jacobs
- Marshall
- Masaki Matsushima
- Matchbox
- Mattel
- Max Factor
- Max&Co
- Mc Arthur
- Mizuno
- Mont Blanc
- Moschino
- Mr. Gugu & Miss Go
- My Little Pony
- New Balance
- Nike
- Nikon
- Nina Ricci
- Ninety Eight Clothing
- Nivea
- Nixon
- Nooka
- Obaku
- Onitsuka Tiger
- Paco Rabanne
- Pentax
- Pewex
- Pierre Cardin
- Playboy
- Prada
- Puma
- Ralph Lauren
- Reebok
- Regatta
- Revlon
- Rexona
- Rider
- Salomon
- Salvatore Ferragamo
- Shelyak
- Shiseido
- Skagen
- Swarovski
- Takahashi
- Thierry Mugler
- Timberland
- Timex
- Tommy Hilfiger
- UGC
- Urbanears
- Valentino
- Vans
- Versace
- Viktor & Rolf
- Vixen
- Welly
- William Optics
- Wrangler
- Yimaida
- Yukon
- Yves Saint Laurent
-
ONA
-
Szukaj
- Losuj
Dziecko
Małe stópki...wielkie serca...

jak zrobić kalejdoskop
źródło: http://www.ohcrafts.net/kids-homemade-kaleidoscope.php
Please note: All measurements given in this tutorial are based on you using a standard kitchen roll tube (23cm long with a diameter of approx 5.3 cm).
Kitchen roll kaleidoscope
1. Begin by cutting your mirror card into three strips. The strips need to be 4.3 cm wide and 21cm long. Once cut, sellotape the three sides together to form a triangular prism. Make sure the shiniest sides face inwards. Push into kitchen roll tube so that the prism is flush at one end.
2. Cut two discs of plastic (I cut them from some old food containers). The circles need to have a diameter of 5.3 cm. One disc needs to be totally transparent whilst the other needs to be frosted. If you haven’t got frosted plastic to hand then simply glue a piece of greaseproof paper onto a transparent disc. Put the transparent disc inside the tube so that it rests at the end of the prism. Tape into place.
Kitchen roll kaleidoscope
3. Pour your beads into the end of the tube. Don’t overfill as the beads need to be able to move around.
4. Place the frosted plastic disc onto the end and secure in place with tape.
Kitchen roll kaleidoscope
5. Turn the kaleidescope over. At this end you need to tape a disc of cardboard (5.3 cm diameter) with a peephole cut into the centre. I also glued a disc of black paper to the cardboard disc just to make it look a bit smarter.
Kitchen roll kaleidoscope
6. Decorate the tube in any way you fancy. I just glued some colourful paper at either end (I like the fact that you could still see the actual tube). I also added a corrugated paper cuff to the middle of the tube. I did this so that you can hold the cuff with one hand and rotate the tube with the other.
- See more at: http://www.minieco.co.uk/kitchen-roll-kaleidoscope/#sthash.jiHM09Xv.dpuf


Komentarze
Podobne inspiracje

184
6
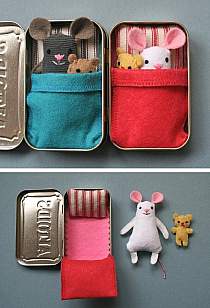
Because you never know when you will need to make a clo…
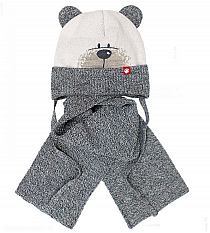
Czapka i szalik dla chłopca, z uszkami jak miś, na zimę…


70
5
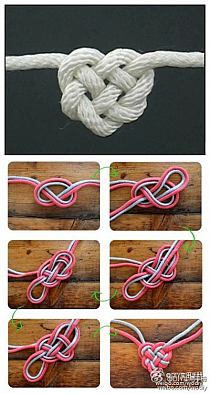
DIY Heart Shape Piñata DIY Projects | UsefulDIY.com
19
4
Party Stuff(Pirate Party) / pirate party
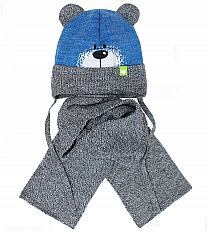
Czapka i szalik dla chłopca, z uszkami jak miś, Yatin,…
225
4
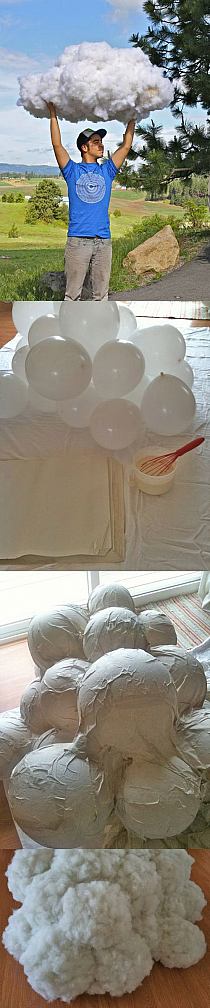
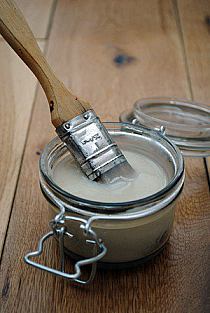
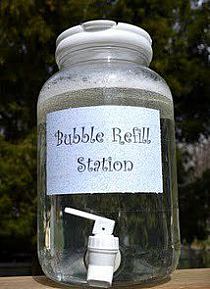
płyn do baniek (4 l gorącej wody, 1/4 filiżanki glicery…

426
3
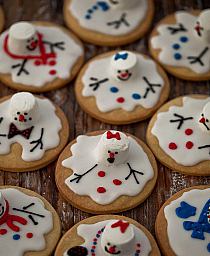
Ciasteczka 'melting snowman cookies' popularne na zagra…


73
3
DIY Custom Bunny Plush DIY Projects | UsefulDIY.com

30
3
The Busy Budgeting Mama: DIY Tissue Pom Poms


W 178 innych kolekcjach


